This blog post provides an overview of Profilometry-based indentation plastometry (PIP), including the steps to perform a PIP test and the PLX-Benchtop device that can be used to perform a test in as little as five minutes.
What is PIP?
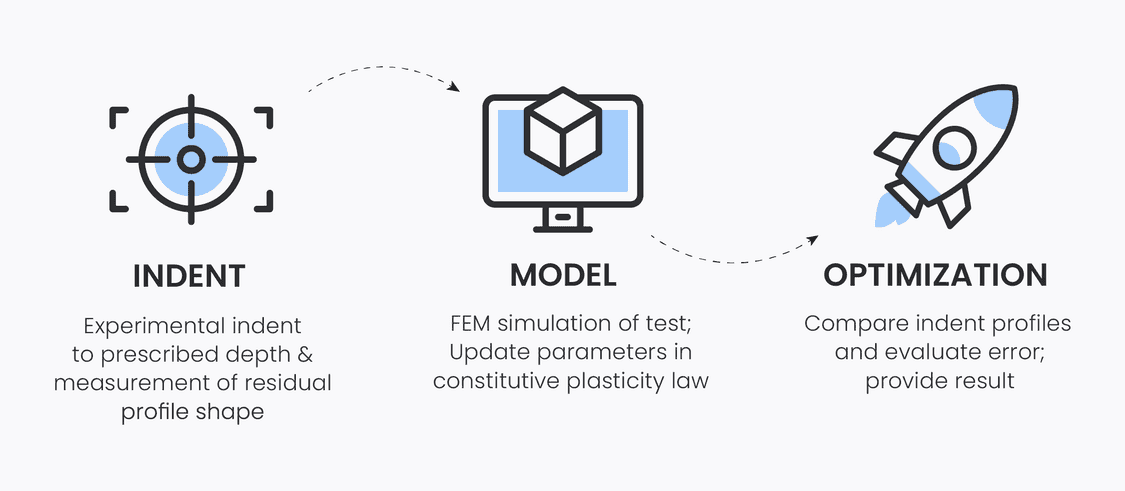
Profilometry-based Indentation Plastometry (PIP) is a method for obtaining a material’s stress-strain curve from an indent profile by using accelerated inverse finite element analysis. The procedure for this is very simple, and the Indentation Plastometer from Plastometrex is designed to seamlessly carry out each step of the process described below:

Indent
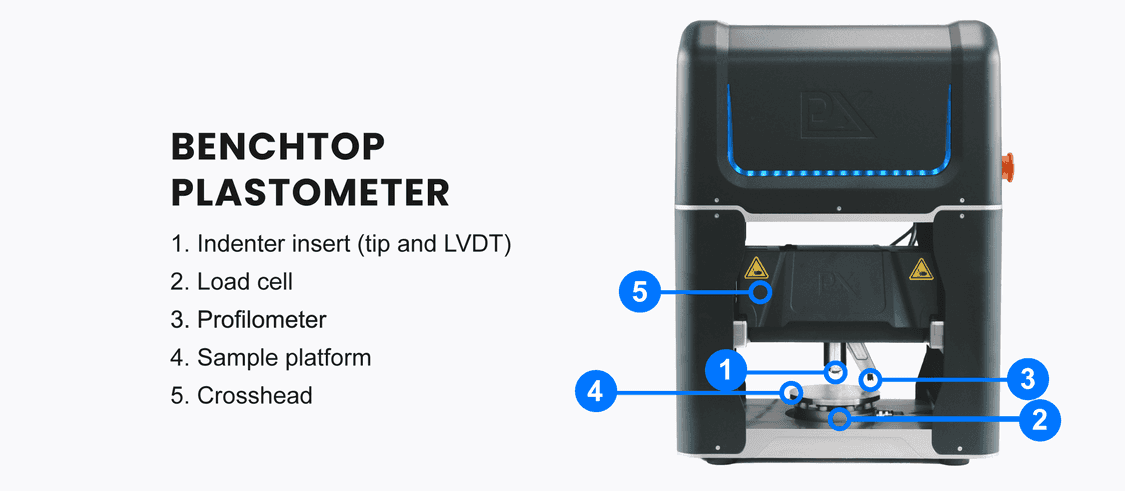
Firstly, the Indentation Plastometer (Fig. 1) carries out an indent of known load to a prescribed depth. It uses a hard, spherical indenter to create an indent ~100-200 µm deep which is ~1 mm in diameter. This is a much larger indent than those created in nanoindentation or hardness tests, which means the indent is probing the bulk material response rather than individual grains.
The Benchtop Plastometer's integrated profilometer (3, Fig. 1) then scans the residual indent profile shape.

Model and Optimisation
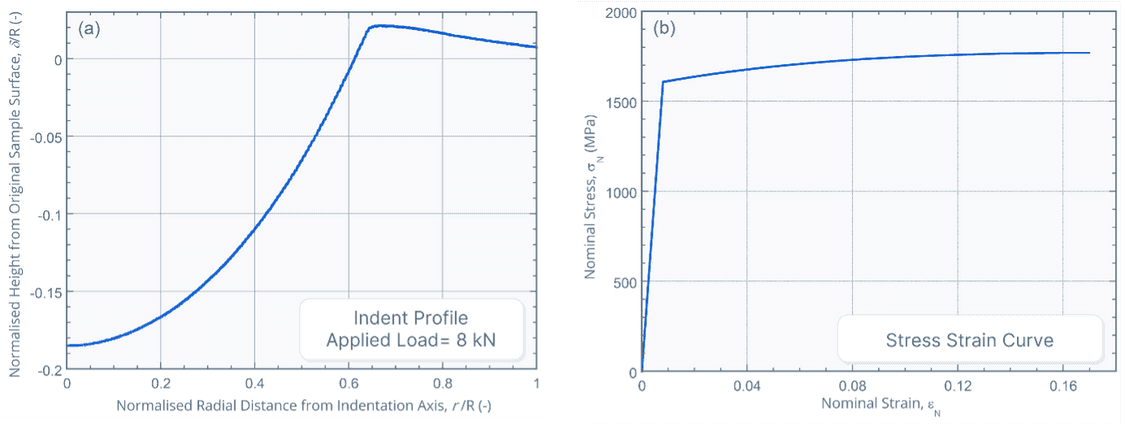
Starting with a trial set of plasticity parameters, a finite element model of the indentation is run. A comparison is then made between modelled and measured residual indent profiles. The plasticity parameters are then iteratively updated until the best agreement between profiles is achieved. These plasticity parameters relate to the stress-strain curve via a constitutive equation, which is used to describe the plasticity. An example of an indent profile and its corresponding stress strain curve is in Fig. 2.

The FEM computations and conversion to a stress strain curve take place fully within the software of the Benchtop Plastometer, without any need for the user to have FEM knowledge or background. The entire process of indentation to stress-strain curve is completely automated and happens in less than 5 minutes. Additionally, the plasticity parameters are available for further modelling, such as simulating the tensile test post necking or the user’s own models.


