Metal additive manufacturing (AM) holds a lot of promise for the modern industrial sector with its capacity for creating complex-shaped and one-off parts quickly and efficiently. However, there is one key step in the additive process which has traditionally been neither fast nor cost-effective: Mechanical testing. Whether for developing powder, or qualifying machines or parts, this step has traditionally been a lengthy and costly affair with countless tensile coupons needing to be printed, machined, and then tested.
Fortunately, recent advances in testing technology have made it possible to significantly reduce the time and cost associated with mechanical testing for metal AM. One such method is PIP testing (Profilometry-based Indentation Plastometry), developed by the former University of Cambridge Scientists at Plastometrex, which can produce stress-strain curves in just a few minutes including all sample preparation. This means that testing time and cost savings quickly amount to 75% and above (as you’ll see later in this article), without compromising on data integrity
In this article:
- Conventional Mechanical Testing: Tensile Testing
- Producing the coupon
- Preparing the coupon
- Testing the coupon
- Results
- A Streamlined Alternative for Mechanical Testing: PIP Testing
- Producing the sample
- Preparing the sample
- Testing the sample
- Results
- Tensile vs PIP Testing: A Comparison
- Time
- Cost
- Conclusion
Conventional Mechanical Testing: Tensile Testing
The current “gold standard” for testing the mechanical properties of AM parts, and anything metallic, is tensile testing, which involves applying tension to a coupon (also known as a sample or specimen) to produce a stress-strain curve. Let’s break down the process:
Step 1: Producing the coupons
Coupons can either be printed as a row alongside a part and/or a part can in some cases be machined into coupons. The coupons usually measure around 100-220 mm in length and 10s of mm in width. As each build usually requires tens of coupons for a testing round, a significant amount of valuable additive material and time is required to produce them.

Step 2: Preparing the coupons
Tensile testing requires highly precise dimensions and finishes. This is where machining comes in, done using a CNC lathe or mill – a step that is often outsourced to specialist machinists and likely to result in lengthy lead-times and administrative work for ordering and logistics.
Step 3: Testing the coupons
Once the coupons have been prepared, they will then be loaded into a tensile testing machine fitted with an extensometer. This can be an extensive outlay, with the price of tensile machines ranging from $50k - $620k, meaning that this step may also be outsourced. A set of grips will hold the coupon at either end, pulling apart to apply tension while the load and displacement is monitored.
Step 4: Results
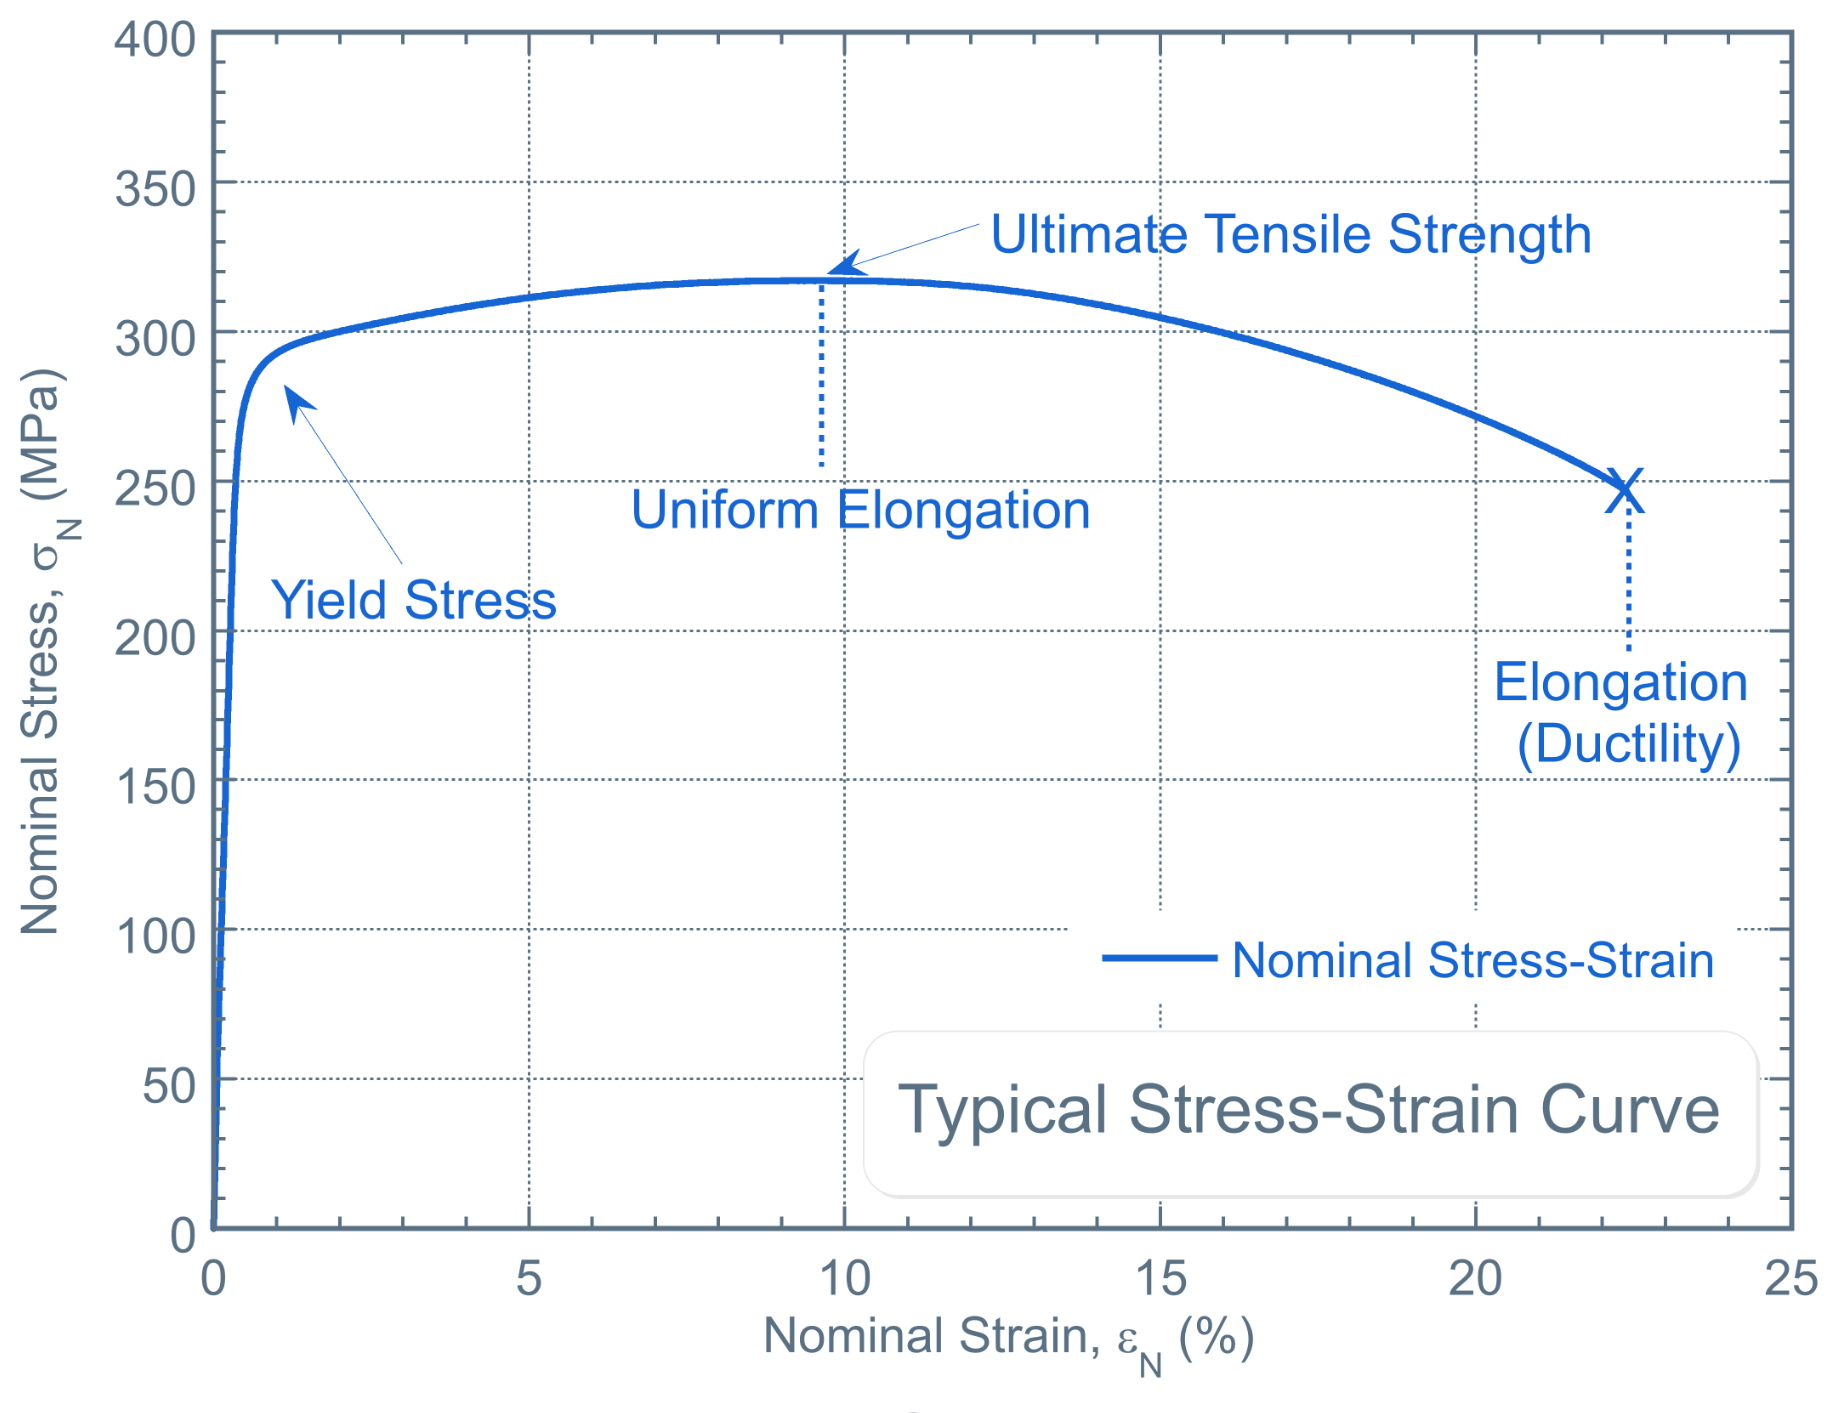
At the end of the tests a stress-strain curve (Figure 2) is produced and key results, like yield strength and ultimate tensile strength (UTS), are delivered.
In summary, this process is hardware, material, energy, and labour intensive, which all adds up in terms of cost and time associated with each test, even when the whole process is conducted in-house. Where parts of the process, such as machining, testing, or both, are outsourced, this can bump up the cost further and cause significant, sometimes months of delays.
A Streamlined Alternative for Mechanical Testing: PIP Testing
For AM users looking to drive efficiencies in their mechanical testing workflow, there are options. One such option is PIP testing (Profilometry-based Indentation Plastometry), used by major AM OEMs, and top-tier academic and industrial institutions, to streamline testing for metal AM.
In fact, by testing in-house with PIP, a leading additive manufacturing OEM saves over $125k annually on testing and material costs alone, compared with tensile testing.
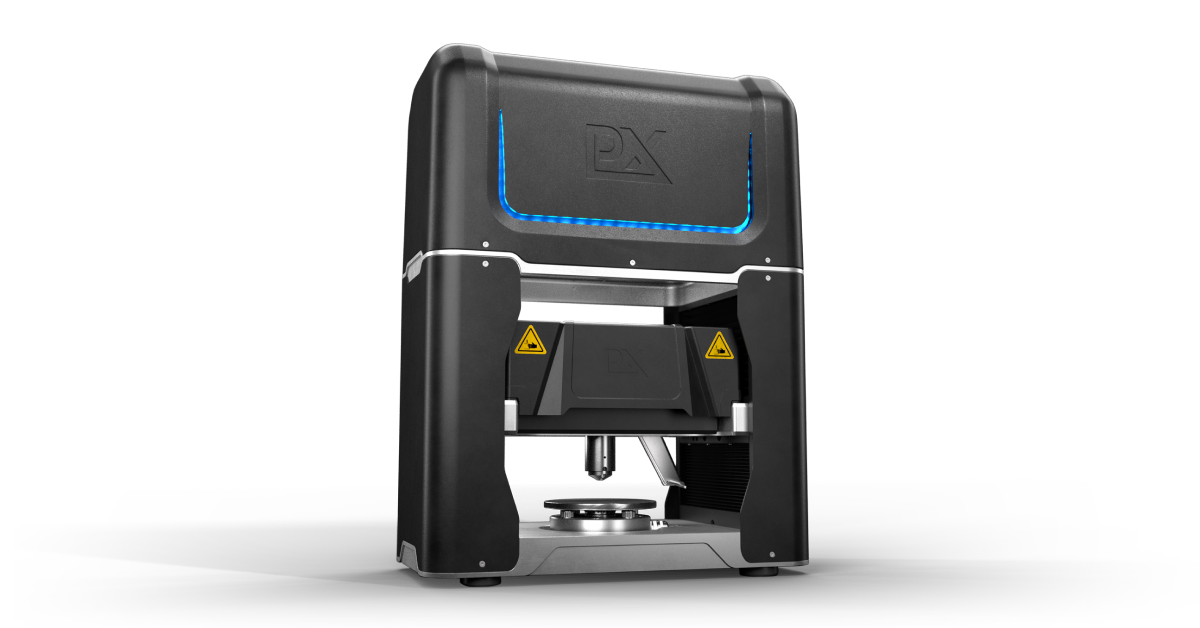
Having looked at the steps involved with conducting a tensile test, let’s now compare that with the process of conducting a PIP test, using the PLX-Benchtop (Figure 3):
Step 1: Producing the samples
PIP can test any sample with a flat surface and minimal dimensions of 3x3x1.5mm. This means that there is no need to create samples specifically for PIP testing - it can be performed on small blocks such as density cubes, or even the part itself.
Step 2: Preparing the samples
The only sample preparation required for PIP testing is a quick grind on a basic grinding wheel to a P1200 grind (600-grit). This process usually takes no more than 10 minutes depending on the material and can take as little as 30 seconds.
Step 3: Testing the samples
All that's left is to place the sample on the sample tray of the PLX-Benchtop and click “Start” in the software. The testing procedure is fully automated, making it easy to use, and eliminating much of the risk of human error.
Step 4: Results
After 5 minutes, both the full nominal and true stress-strain curves will be plotted on the software as well as the numerical values of the UTS, yield stress, and uniform elongation. Measurements like Brinell hardness and surface roughness are also available.
With just two clicks of the mouse this information, and the profile data, can be exported to either pdf for easy overview or csv for further in-depth data analysis or modelling and simulation work.
All of this is done by one machine – no lathes or mills, extensometers, or tensile machines, and best of all – no outsourcing. A PLX-Benchtop is also a fraction of the size of a tensile machine and weighs in at just 35kg, meaning it can comfortably sit on a desk.
Tensile vs PIP Testing: A Comparison
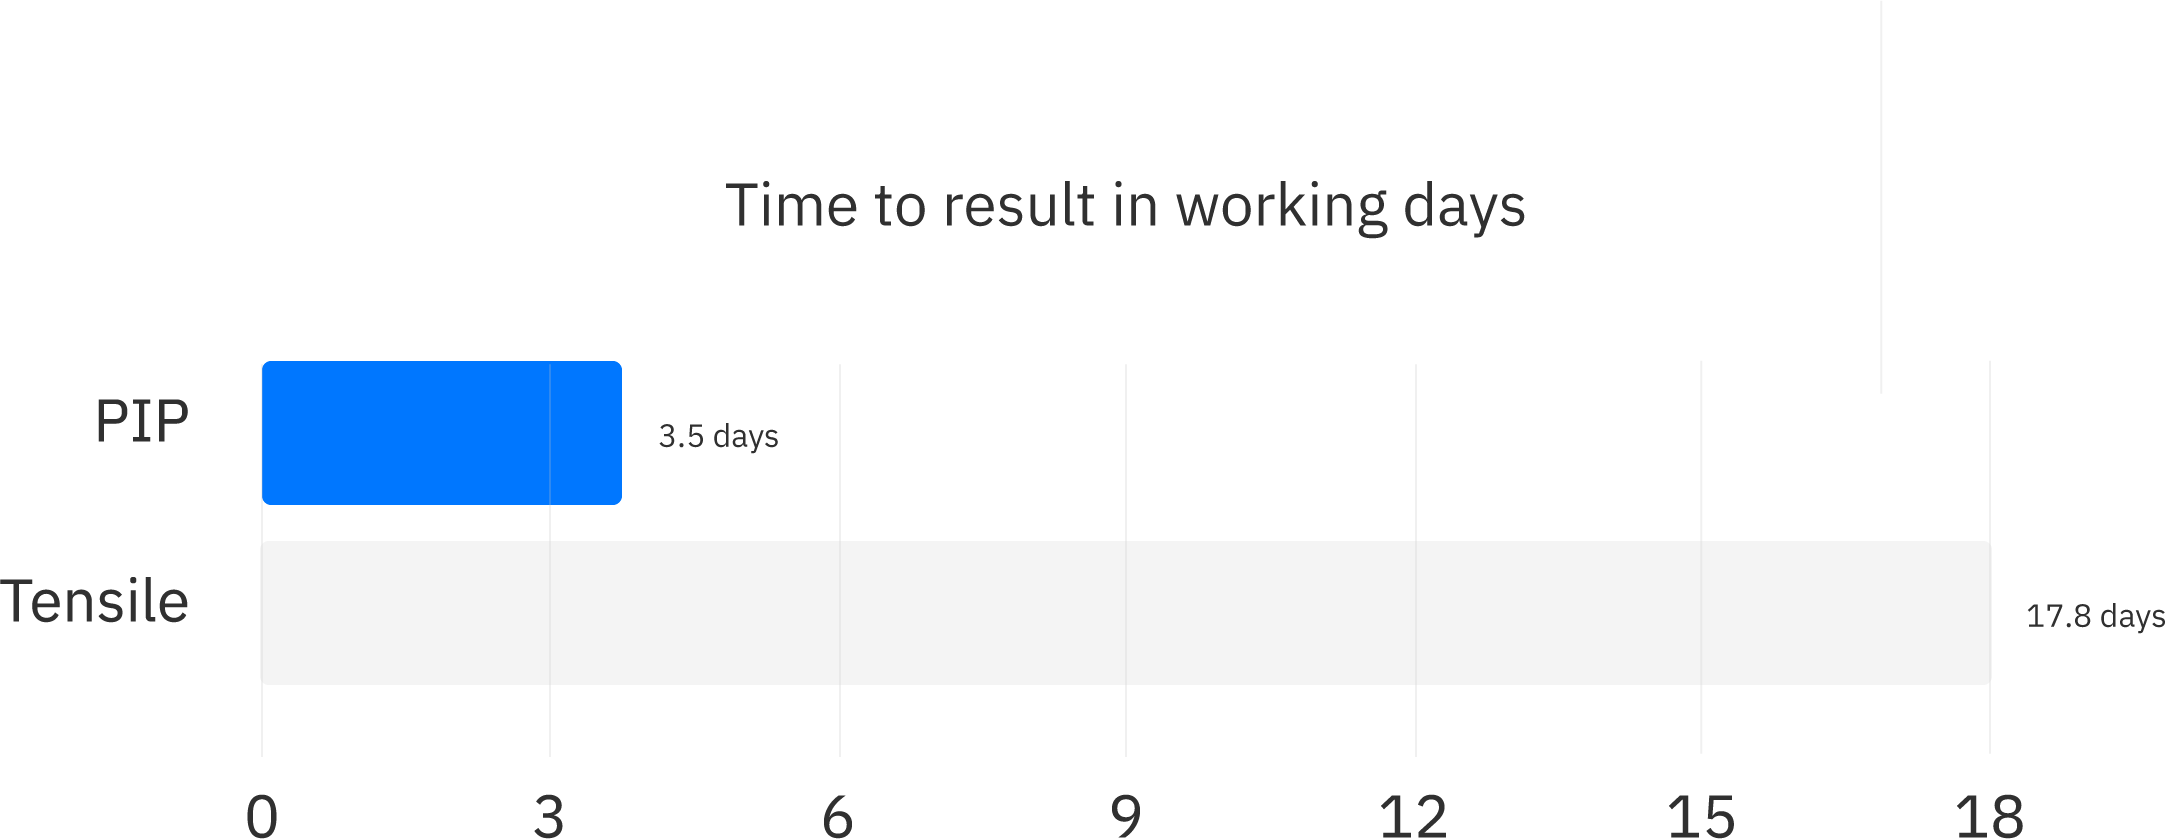
When the time and cost of each step is taken into consideration, we see that PIP testing can save weeks (sometimes months) of waiting and operational time, as well as delivering a substantial cost saving, when compared to conventional mechanical testing for metal AM.
Below is a conservative example of how 80% of time and 75% of cost was saved by using PIP testing vs outsourced tensile to conduct 33 tests on IN718 samples:
Time
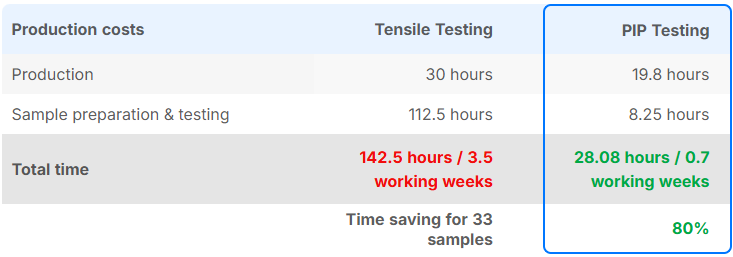
A total of 114.4 hours, or almost 3 weeks were saved by using PIP to conduct the 33 tests, in comparison to tensile testing.
Unlike tensile, PIP testing with a PLX-Benchtop requires only a small volume of material to extract tensile stress-strain curves. The system can test samples as small as 3x3x1.5 mm, however, for this example, 1 cm3 specimens were used as this size is easier to handle. This still reduced the required material volume by 98% compared to the 50 cm3, 200 mm length, cylindrical ASTM E8 tensile coupon.
Whereas machining and testing were outsourced for the tensile specimens (a step which can often add weeks of lead time), the only sample preparation required for the PIP testing was a quick, 10-minute grind. The tests were easily conducted on the PLX-Benchtop by an existing member of staff from a standard desk. This meant that sample preparation and testing time were reduced to just 10 and 5 minutes of a staff member’s time per test.
This all meant that a total of 114.4 hours, or almost 3 weeks were saved by using PIP to conduct the 33 tests, in comparison to tensile testing.
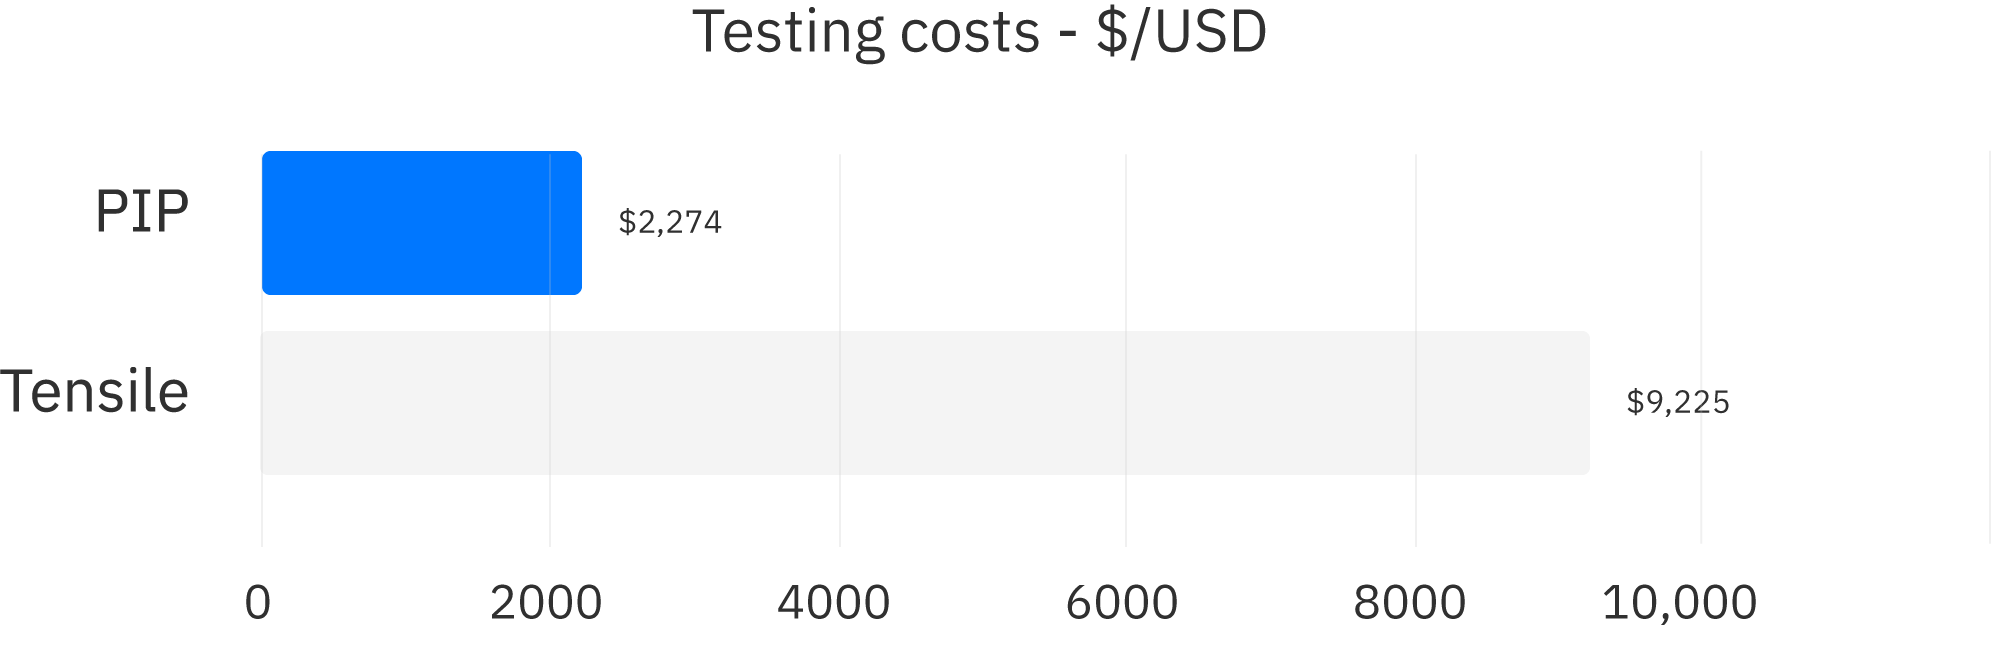
Cost
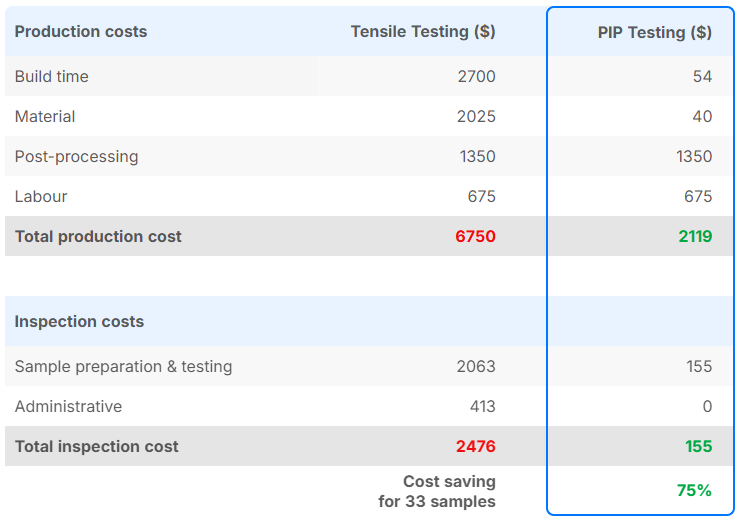
A total cost saving of $6,951 was achieved by using PIP to conduct the 33 tests, in comparison to tensile testing.
With the 98% reduction in material used for PIP vs tensile testing, the build time and material costs were reduced significantly. Labour and post-processing costs were conservatively maintained during both the tensile and PIP tests, to account for aspects like printer set-up and heat treatment.
By enabling quick and easy in-house sample preparation and testing, the only other costs related to PIP testing were based on the user’s time. With an estimated hourly salary of $18.75, this meant that the 10-minute sample preparation and 5-minute testing time took the associated cost per PIP test to $4.70. Administrative costs were negligible, especially when compared to the logistics and ordering activities required for the out-sourced tensile testing.
All in all, this meant a total cost saving of $6,951 by using PIP to conduct the 33 tests, in comparison to tensile testing.
Conclusion
As well as being cost-prohibitive, conventional testing methods have been holding back the industrial adoption of additive manufacturing by hampering one of the main selling points of AM: speed. With new methods, such as the PIP test, time and cost associated with additive material development and machine and part qualification can be slashed, enabling engineers to quickly identify any structural defects or weaknesses in additively-produced parts without having to conduct destructive tests on multiple components. The streamlined nature of PIP makes it an ideal candidate for cost-effective high-throughput testing, making monitoring stress-strain curves at each phase of production and assembly much more feasible. This would mean that challenges could be detected and rectified earlier in the process, saving further time and cost and increasing confidence in AM performance.
By Dr Jimmy Campbell

