In this blog post, we discuss the requirements for accurate indentation testing of metals.
Mechanically Testing a Representative Volume during Indentation
During indentation, a region underneath and around the indenter is plastically deformed (typically to strains of up to a few tens of %, depending on the relative depth of penetration). If the way that the deformation occurs is to reflect the mechanical characteristics of the bulk, then the region clearly needs to be sufficiently large. In particular, for polycrystalline samples (i.e. the vast majority of metallic materials), it needs to constitute a representative assembly of grains (capturing the effects of factors such as crystal structure, grain size, crystallographic texture, composition, phase constitution, grain boundary structure, prior dislocation density, impurity levels etc). The minimum size of the plastically deformed region cannot be accurately defined in terms of the number of grains within it, but an order of magnitude for it is at least a few dozen and preferably more. The diameter of the indent should evidently be larger than the grain size. So-called “nano-indentation”, creating indents with dimensions of a few µm or less, is of no use for obtaining the bulk mechanical properties of most materials.
Mechanisms of Plastic Deformation
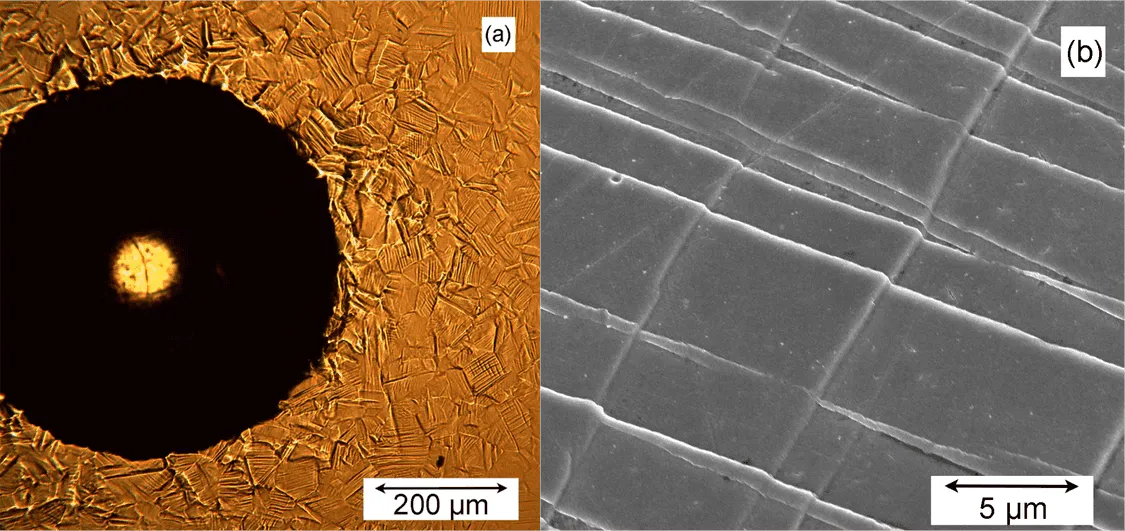
Plastic deformation of metals usually occurs as a result of the glide of dislocations, driven by shear stresses. (In some cases, deformation twinning may contribute, but this also requires shear stresses in a similar way, and also involves no volume change.) In polycrystalline materials, individual grains must deform cooperatively, with each undergoing a complex shape change (requiring the operation of multiple slip systems), consistent with those of its neighbours. Inspection of the free surface around an indent provides instructive insights into the details of this deformation – the micrographs in Fig. 1 illustrate this. Numerous surface steps can be seen, with heights of several hundred nm. These arose from many dislocations following each other along particular slip planes (to create persistent slip bands). Although the strains in these near-surface regions are low (~ few %), evidence of multiple slip can be seen in most of the grains.

Plastic Deformation of Single Crystals
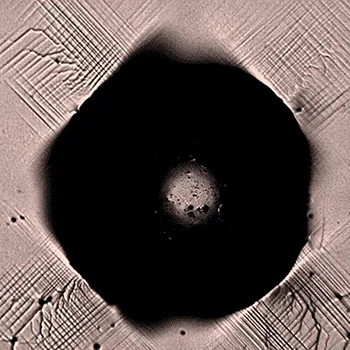
Single crystals of metallic materials are relatively rare. Of course, they’re not without technological importance, with the use of highly creep-resistant Ni-based superalloy single crystals in turbine blades constituting an excellent example. Such materials tend to be highly anisotropic, particularly in terms of their plasticity characteristics. The reason for this is evident in Fig.2, which shows how their indentation response differs from that of a typical polycrystalline metal. Multiple (two system) slip occurred throughout the sample, but, since the same type of deformation took place throughout the deformed region, it happened to different degrees in different (in-plane) directions, losing the radial symmetry. A different response would be obtained if the orientation of the indented surface were different. Since an indentation test generates multi-directional loading, it cannot be used to obtain stress-strain relationships for particular orientations of single crystals.


